")


With every opportunity, we get to photograph weddings and branding shoots that require a little bit more arsenal to supplement our gear, we bring these kinds of boards. We never know what kind of lighting and environment we’re going to get and very often these tend to become a lifesaver. As you may have read, we like to be as prepared as possible. We may haul a little bit more gear, but we think that it’s worth it.
We started incorporating these styling boards very early on in our career but only started getting questions about where we get them and how to create one. We use fabrics that are wrinkle free, sometimes use fabrics that need a little more sturdiness by stapling them to the canvas frame and sometimes we use Venetian plaster to create a more textured look.
While this kind of texture may be easily recreated with other methods, we definitely need to stress how important it is to use Venetian plaster. Victor has a background in painting and color consulting opted for this kind of plaster instead of a drywall mix. We tried it once and found that after several trips to wedding days the texture chips easily and becomes less usable. Venetian plaster is used to create a rustic look.
This kind of styling board can be used in a variety of ways, from flat lays to product backgrounds and to create even a faux wall. We chose gray for our tutorial because we have lighter colors and dark colors in our styling board collection but wanted to experiment with something neutral. Because Venetian plaster is a little bit special, you won’t be able to find it at your local Home Depot, but Amazon has some great options. The best thing is that you can have it color based and you can use water-based acrylic paint to paint over it with a different color if you grow tired of the color. A quart of Venetian plaster goes a long way; you can probably make half a dozen.
Go all out, get a little creative with the textures. We find that the imperfections give a bit more depth to an image and character.
Things to Note:
Venetian plaster generally come as tintable bases, but you can order a quart without a color so you can paint it over with different paints to extend the Venetian plaster usage.
Materials Needed:
- 20×24 Canvas board
- Wide bristle brush
- Stirring stick
- Can opener
- Venetian Plaster (try to get the brand Modern Plaster)
- Putty Knife
- A Quart of Acrylic water-based paint(tinted in the same color family as the Venetian plaster, this paint will work as an undercoat).
- Plastic Tarp or newspaper
 Gather materials and lay out everything you need in a closed area to prevent spillage.
 Get your acrylic water based paint ready and stir before painting in order to ensure proper mixing.

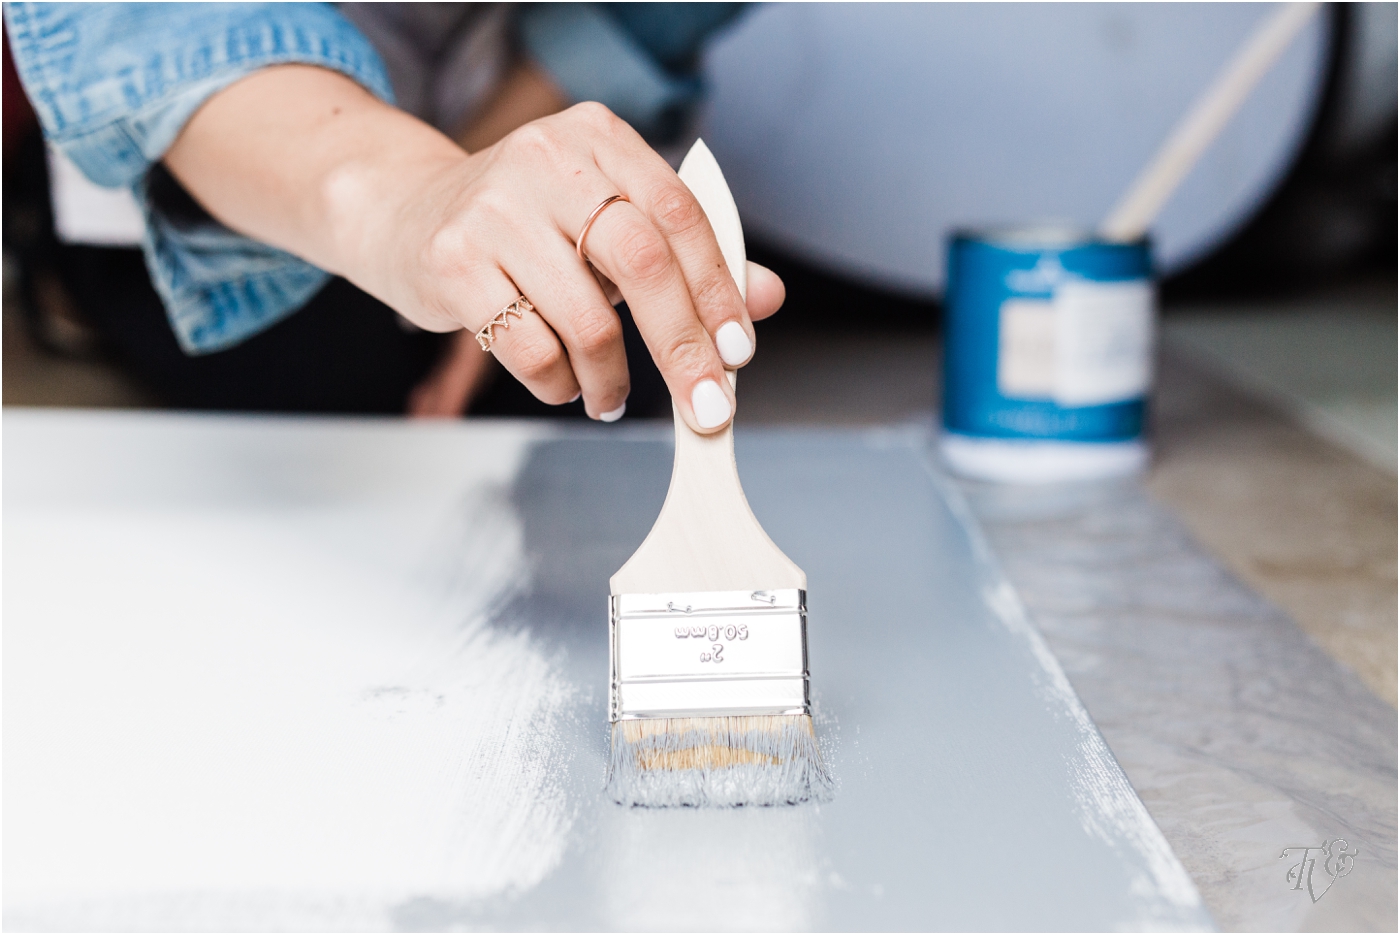
 Start painting a base coat so the plaster can adhere well to the canvas.
 It doesn’t have to be perfect but, try to cover the whole canvas with the brush.
 Leave to dry overnight or up to 2 hours.
 Grab your Venetian plaster and putty knife or anything will help layer the plaster on the canvas. Victor encourages you to get creative with whatever tool you’re going to use to spread the Venetian plaster.
 Make sure to mix the plaster well it has a thick consistency.
  Lather up!
 Scoop the plaster onto your putty knife and layer it over the canvas.
 Try to cover all of the canvas first.
  Slowly create the ripples and lines you want with the putty knife. The less perfect, the better.
  Leave to dry for 24 hours before using.
  Voila!
 Play around and get creative.


 All of our materials were provided by Tamalpais Paint & Color Corte Madera CA. Canvas is from Michael’s.
Comments
")
Comments Off on How to Make a Textured Styling Board for Product Styling